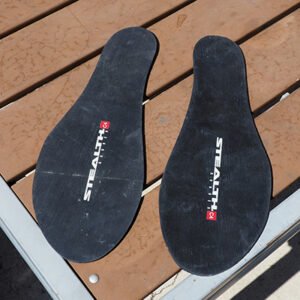
Years ago (probably like 2018), I happened upon a Five Ten Stealth rubber climbing shoe resole kit at an outlet sale. This thing caught my eye as it was for size 13 feet (which is insanely large) and was stinkin’ cheap. I bought it with the idea that I’d be able to pull off a few half resoles with it eventually. It also seemed like it’d be a lot of fun to learn. However, it wouldn’t be until late 2023 when I finally try to resole my own climbing shoes. But hey, better late than never, right?
You see, it was right around the time where I had about three pairs of Five Ten Moccasyms that were nearing the end of its sole. Seeing as they’re my favorite gym shoes and I didn’t want to break out a new pair, I decided on an alternative. Repairing them myself and finally putting the resole kit to use. Also a little backstory, I’m a bit of a jeweler, pretty crafty with my hands, and love a good challenge. So, with a bunch of tools already laying around and an iron will, I take it upon myself to learn the art of the climbing shoe resole. Here’s how it went.
The Shoes in Question
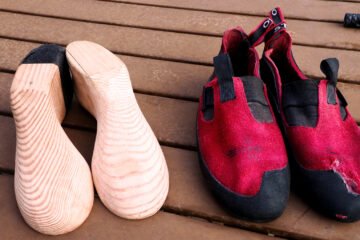
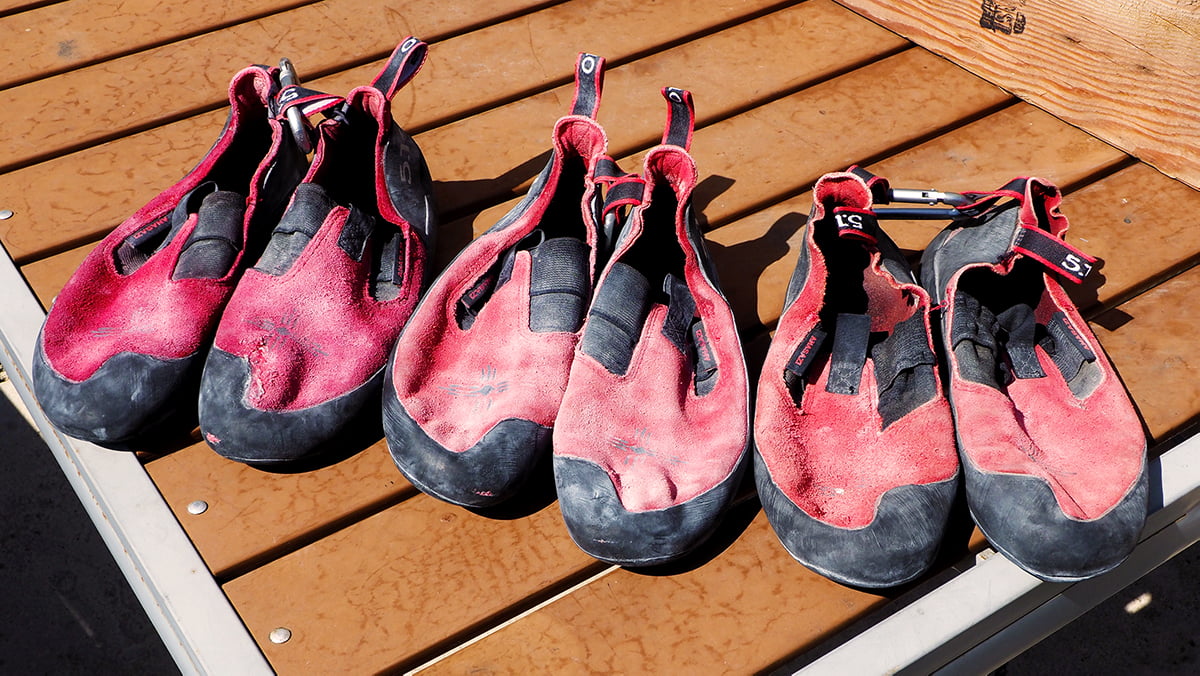
So, here are the Five Ten Moccasyms I want to resole. As you may know, the original Moccasyms have been discontinued and are somewhat of a rarity now. As you can see, the left and center pair have thin rands that you can see peeking through. The pair on the right are actually my first climbing shoes ever, so they’re a bit special to me. Unfortunately, they show signs of delamination and a thin sole. All-in-all, there’s a lot of incentive to learn how to resole climbing shoes if I’m able to patch these up. For my first resole, I’m going to resole the left-most pair of Moccs since the upper had ripped already. Also, only a half-sole is necessary.
Learning How to Do a Climbing Shoe Resole
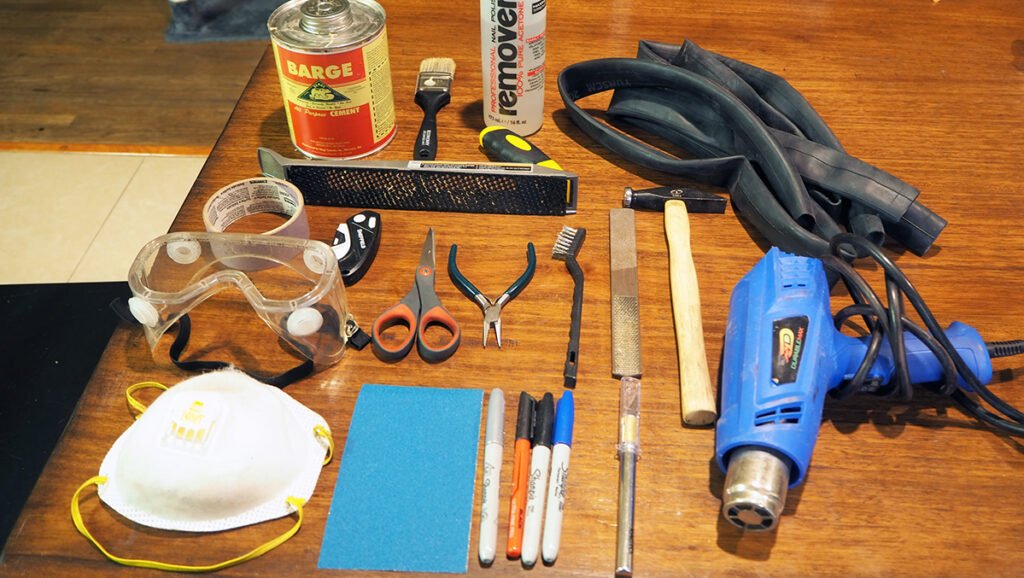
However, before attempting to resole my own shoes I did a bunch of research online first, like any good student. I did a lot of sleuthing through forums and watched a ton of climbing shoe resole videos. Through this, I gathered a list of all the tools and materials I’d need. Fortunately, I have a lot of this stuff already in my garage, so just a few extra purchases were required. As far as materials go, I just needed to buy a a quart of Barge All-Purpose cement. This is one of the best contact cements to buy in the US when it comes to shoe repair. At least, that’s what I’ve read countless times. As far as tools go, I bought a standalone belt sander, wood rasp plane, and safety equipment.
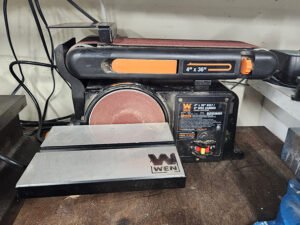
I cannot stress enough how important the standalone disc and belt sander was, so I’m making a little note here. This is by far the tool I used the most and it saved me a ton of time and effort. From shaping the shoe last, sanding off old rubber, and cleaning up extra material, this thing worked wonderfully.
Now, onto all the tools and material…
Tools Used:
For the Shoe Last:
- 4″ x 6″ lumber / two pieces around ~12″ long
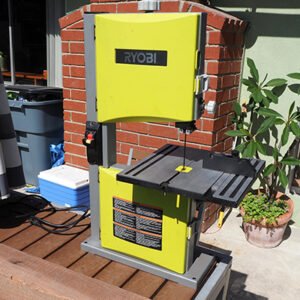
- 9″ band saw
- Belt sander (mine is a 4″ x 36″ disc and belt sander)
- Bench vice
- Wood rasp file
- Wood rasp plane
- Dust mask
- Safety goggles
For the Climbing Shoe Resole:
- Barge all-purpose cement
- Resole rubber
- Rand rubber (if necessary)
- Pliers
- Hammer
- Heat gun
- Scissors / tin snips
- X-acto / utility knife
- Acetone
- Painter’s / masking tape
- Sharpies
- Steel brush
- Bike tire tubes (used in lieu of a shoe press)
- Rubber bands
- 60 or 80 grit sanding paper
- Dust mask
- Safety goggles
DIY Climbing Shoe Resole Video Process
DIY Climbing Shoe Resole Step-by-Step
1. Get or Make a Shoe Last
There are shoe lasts available to purchase online, but I opted to make my own for a more personal fit. Climbing shoe lasts are also difficult to come by, and most lasts I’ve found are for commercial or dress shoes. Anyhow, these lasts are tailor-made for the Five Ten Moccasyms and will last me forever. Overall a good time investment since I’ll be resoling my Moccasyms into antiquity. However, for those that don’t want a shoe last, you could also stuff the shoe tight with newspaper or plastic bags. Just make sure there’s no space in the toes.
So first off, I started by outlining the shape of the Moccasyms on a 4″x6″ piece of lumber. It doesn’t have to be exact and I intentionally leave extra room to sand down later. I then used my band saw to cut it out, leaving me with a rough shape to work with. Using the belt sander, I slowly sand the last into shape, making sure to stuff it into the shoe occasionally to make sure it’s fitting right. The bulk of the shaping is done by the belt sander, although I also use a rasp plane and rasp file for more delicate curves. However, the rasp plane and file weren’t entirely necessary, I could have done everything on the belt sander.
The toughest part was getting the second last exactly like the first. I found that making the last was based mostly off of intuition. Take a little bit here, a little bit there, wherever feels right. Turns out, I took a little too much off the heel of the right last. I quickly fixed this with strips of duct tape that I stuck on the backside of the last. Eventually, it evened out and fit the shoe perfectly. Not bad.

2. Prepping the New Rubber
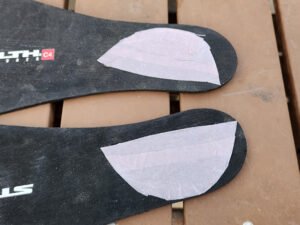 Next step is to prep the new rubber. I do this by taping around the sole of the shoe, leaving me with an outline I can work with. I also mark on the old soles where I plan to sand off the rubber with a sharpie. Of course, this could have also been done by simply tracing an outline on a piece of paper. The key was to leave a little extra room that would run over the top of the toe rands. That way, there’s enough rubber that can be rolled over the edge when pressed and then sanded down.
You’ll notice I basically cut out a small toe patch for the resole compared to a usual half sole. That’s because I wanted to test a theory of whether more rubber is actually needed for a half sole or if it can be done with less. Some say the half sole should be larger so that the joint is further toward the back of the shoe, putting less stress on the joint when climbing. I’ll update you on the results after some testing whether this is true or not.
(UPDATE: The resole rubber patch should be cut larger than just the upper toe section like I had originally done. After a few weeks of climbing in the newly resoled shoes, the continuous stress on the joint caused the rubber to slowly peel apart. Ideally, the half sole rubber patch should be larger so the joint sits behind the ball of your foot, where the least amount of stress is placed.)
With my tape outline cut out, I place it on my resole rubber sheets and cut those patches out. I then sand a 45 degree bevel on the backside of the patches (where it’s straight), which will be forming the joint on the rear of the shoe.
3. Sanding Down the Old Rubber
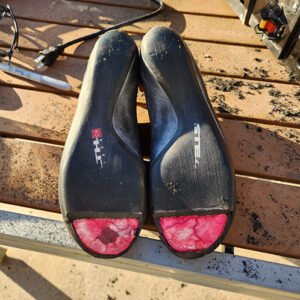 After that’s done, it’s time to get all the old rubber off. I’ve read that you can make an incision in the sole, use a heat gun to activate the glue, and then peel the old rubber off. However, there’s a lot I’ve read advising against this. That’s because it can potentially delaminate the remaining rubber or warp the midsoles. However, since I have that belt sander at my disposal, I’m putting it to good use. Apparently, sanding down the old rubber is best as it avoids the risks mentioned using the heat gun method.
Using the sharpie guideline I made earlier, I carefully sand off the old rubber. Good thing I bought safety goggles and a dust mask, because this step got really messy with material flying everywhere. It’s key to go slowly in this step so I don’t heat the old rubber up too much. Once I reach the midsole and upper, I make sure I don’t nick it. I also sand a 45 degree bevel at the cutoff point, which will form the joint with the new rubber. With everything looking prim and proper, I proceed to inspect the rands.
4. Removing the Rands & Prepping Randing Rubber
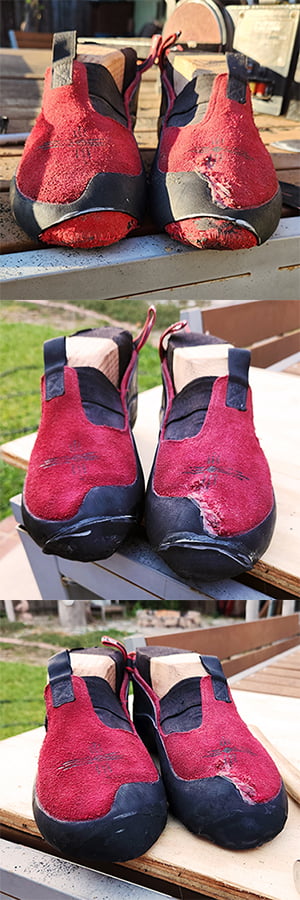 At the picture at the top of the post, you can see this pair (left-most) had rand exposed on the left shoe. The right shoe also had a paper thin rand that I could almost pierce through with my fingernail. So, both shoes would have to have the rands replaced. This step must be completed before putting on the new soles. However, not all climbing shoes will need to have the rands replaced, mine just happen to have a lot of wear.
I start by outlining the worn rand I want to remove with a sharpie. Then I use an X-acto knife to cut an incision of the outline, taking care not to touch the upper. I then use a heat gun to warm up the old rand and activate the glue. A couple passes with the heat gun and I can then peel off the old rand with pliers. Using the belt sander, I sand a small 45 degree bevel on the edge of the shoe’s rand. This will serve as the new joint with the new randing rubber.
I then prepare a new rand by cutting out a long enough strip to cover the old rand. It needs to be adequate in both width and length in order to cover the old rands well. I sand a 45 degree bevel on the randing rubber lengthwise. I then use some acetone and a steel brush to clean both the randing rubber and the shoe’s rubber. Just apply some acetone on the rubber, brush it down, and it’s ready to glue. This will help the glued surfaces adhere to each other better.
5. Applying New Rands & Sanding
Using Barge cement, I apply a small coat of it to both the randing strip’s inside and the shoe’s toe. The glue needs to be covering all parts of the rubber and shoe in order for the best bond. The shoe and new rand are then both warmed up for a few seconds with the heat gun in order to activate the glue.
Once the rand is nice and pliable, I start at one end of the rand and apply the beveled edge to meet with the shoe’s beveled edge, leaving a tiny bit of excess randing rubber on the end that I will cut off later. Overlap of the joint is okay. Once first contact is made and pressure applied, I pull the rest of the randing rubber to create slight tension. I apply the rest of the randing rubber in a rotating fashion to cover the joint and the rest of the shoe’s rand. The end is then snipped off and the rand hammered down and pressed in. It looks a little rough on the edges at first, but this will be cleaned up soon.
After the glue is given some time to cure, it’s now ready to be sanded down. I sand the overlap of the rand’s joint smooth as well as make the shoe’s bottom edge 90° square. Once everything is looking good, it’s time to apply the resole rubber.
6. Prepping & Applying the Half Sole
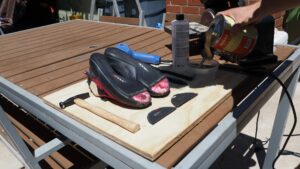 I again prep the new half sole with acetone and scuff it with a steel brush and let it dry. Barge cement is then applied to both the half sole and the shoe’s midsole with a thin coat. A popsicle stick or putty knife can be used to spread the glue evenly. I then use a heat gun to activate the glue for a couple seconds, and now it’s bonding time.
The half sole is applied, starting from the rear where the joint is and then moving forward. A little overlap is okay on the joint as it’ll be sanded down later. I press the half sole firmly to the shoe, working the pressure from the center and out to the edges. Then I give the rubber a few whacks of the hammer. This helps to create a tighter bond. The edges of the half sole are then rolled over the rand and hammered down.
7. Pressing the Shoes
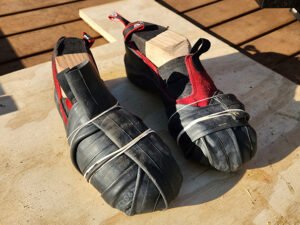 Now it’s time to press the shoes. This is crucial as it keeps the glued surfaces tightly together, allowing the glue to work its magic. Under high pressure, this results in an extremely strong bond once the glue fully cures. Professional shoe cobblers use a sole press in order to do this, but I don’t have one as I am not a professional shoe cobbler and they are quite expensive. So instead, I’ll be using bicycle tubes to wrap the shoe up. Call it the poorman’s press.
I wrap the shoe tightly and make sure the half sole’s edges are still curled around the rands. There should be no gaps and even pressure around the entire sole. I use a couple rubber bands to keep the bike tubes in place give it time to cure.
Other ways of potentially pressing the shoes can be done with plywood and C-clamps. Or, you could add plywood and weights to the top of the shoes while they are on a flat surface.
8. Sanding the Finished Shoe
Once the glue is allowed 24 hours to cure, it’s time to unwrap the shoes and sand them. I use scissors to trim off the excess rubber of the half sole, leaving a little rubber left that can be cleaned up. I then slowly sand the bottom joint and the edges down flush, making sure to take breaks. The final step is to sand it by hand with a sanding block. This smooths out all the rough spots that the belt sander might have caused. And voila, the final result!

My Thoughts on the Climbing Shoe Resole Process
Although a bit sloppy, in the end it’s my first climbing shoe resole and I’m pretty happy with the results. Of course, I can see room for improvement on future resoles and now have experience on getting the job done easier. Overall, it takes a bit of patience and effort, but it was fun to learn and pull off. I also really appreciate the craft of shoe cobblers now, it really is an art in and of itself. Here are some tips and tricks I learned from repairing my own climbing shoes:
Climbing Shoe Resole Tips & Advice
- Go slow and take breaks when sanding. This is important for accuracy and to prevent the rubber from heating up too much.
- Use a heat gun or allow Barge cement to dry and become tacky before applying.
- Leave enough rubber on the half sole to pull over the rands. 3/16″ to 3/8″ is ideal.
- Make sure to always use safety goggles and a dust mask, I learned this early on making the shoe last.
- It’s better to have excess rubber than too little rubber, the excess can be sanded off.
- Contact cement is pretty thick, a stiff brush works wonders.
- Mise en place, have all your tools and materials ready at your disposal for each step.
***UPDATED RESULTS***:
The shoes held up well for about a solid month, but my biggest mistake was in fixing the rands and the size of the resole rubber patch. The rands should extend into the bottom of the sole, creating a solid foundation for the resole rubber to adhere to. Also, the resole rubber patch should be cut larger than just the upper toe section like I had originally done. After a few weeks of climbing in the newly resoled shoes, the continuous stress on the joint caused the rubber to start peeling apart. Ideally, the half sole rubber patch should be larger so the joint sits behind the ball of your foot, where the least amount of stress is placed. If you attempt to do your own climbing shoe resole, please take these points into account.
This article was written mostly to show how the climbing shoe resole process is done. And for all the climbers out there who get their shoes resoled, hopefully this can shine some light on the cobbler’s job. For those interested in having their climbing shoes resoled, here are a couple personal shops I’ve gone to before that do a great job on repairing climbing shoes. For more resole shops, check out this page.
Climbing Shoe Resole Shops
*For those whose climbing shoes are beyond repair, check out our guide on how to choose climbing shoes*


